n8n Tutorial for Beginners: Build Your First Workflow in 20 Minutes
This n8n tutorial walks you through building a real, working automation from scratch — no prior experience needed. By the end you'll have a live workflow that captures form submissions, saves them to Google Sheets, and fires a Slack notification automatically.
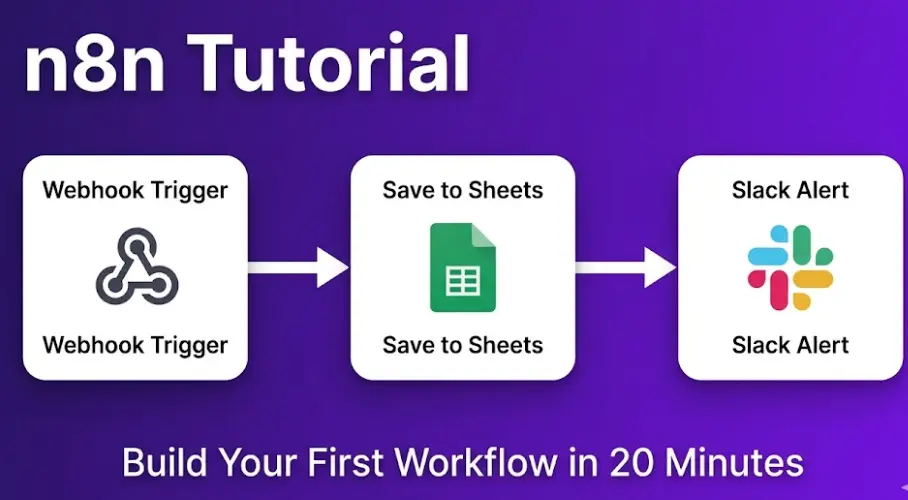
What you'll build in this tutorial
A 3-node workflow that runs automatically whenever a webhook receives data (simulating a contact form submission):
In this tutorial
- Prerequisites — what you need before you start
- Step 1: Open n8n and create a new workflow
- Step 2: Add a Webhook trigger node
- Step 3: Add a Google Sheets node
- Step 4: Add a Slack notification node
- Step 5: Test the workflow end to end
- Step 6: Activate and go live
- 5 mistakes beginners make in n8n
- What to build next
- FAQ
Prerequisites — What You Need Before You Start
This tutorial assumes zero prior n8n experience. You need three accounts — each takes under 2 minutes to set up:
Sign up for a free trial at n8n.io — no credit card required. Alternatively, run n8n locally: docker run -it --rm -p 5678:5678 n8nio/n8n and open localhost:5678.
Any Gmail account works. Create a blank Google Sheet and note its URL — you'll paste it into n8n in Step 3. Add headers to row 1: Name | Email | Message | Timestamp.
A Slack workspace where you can create a test channel #n8n-test. No Slack? Swap this node for a Gmail node — the steps are identical.
New to n8n? Read What is n8n? The Beginner's Guide first — it explains nodes, triggers, and how n8n compares to Zapier. This tutorial picks up from there.
Open n8n and Create a New Workflow
~2 minutesLog into your n8n instance (Cloud or localhost:5678). Click "+ New workflow" in the top right. The canvas editor opens — a blank grid where you'll build everything.
Before adding nodes, rename the workflow. Click "My workflow" at the top and type something like "Contact Form → Sheets + Slack". n8n autosaves every change — but hitting Ctrl+S (Cmd+S on Mac) is good practice before testing.
The canvas has two zones: the top toolbar (save, execute, activate toggle) and the main canvas area where nodes live. You'll work mostly on the canvas — click anywhere on it to add nodes.
Add a Webhook Trigger Node
~3 minutesEvery workflow needs a trigger — the event that starts it. Click the "+" button in the centre of the blank canvas (or press Tab). Type "Webhook" in the search and click it. The node appears on the canvas.
Click the Webhook node to open its settings. Configure three fields:
- HTTP Method → set to POST
- Path → n8n generates a unique path automatically. Leave it as is.
- Respond → set to "Immediately" so the sender gets an instant 200 OK without waiting for the full workflow.
Click "Listen for test event" inside the node. n8n waits for incoming data. Copy the Test URL shown — you'll use it in Step 5.
# Your webhook Test URL looks like:
https://your-instance.n8n.cloud/webhook-test/abc12345

# Quick test from your terminal:
curl -X POST https://your-instance.n8n.cloud/webhook-test/abc12345 \
  -H "Content-Type: application/json" \
  -d '{"name":"Jane Smith","email":"jane@example.com","message":"Hello!"}'
Test URL vs Production URL: n8n gives you two URLs. Use the test URL (/webhook-test/…) while building. The production URL (/webhook/…) only works when the workflow is Active. Always build with the test URL.
Add a Google Sheets Node
~5 minutesHover the right side of the Webhook node and click the "+" that appears. Search for "Google Sheets" and select it. Configure the node:
Click "Create new credential" → sign in with your Google account → grant n8n permission. Saved once, reused everywhere.
Set to "Append or Update Row" — adds a new row each time the workflow runs.
Paste your Google Sheet URL or search by name. Select the sheet tab (usually "Sheet1"). n8n reads column headers from row 1 automatically.
Map each column to incoming data. Name → {{ $json.name }}, Email → {{ $json.email }}, Message → {{ $json.message }}, Timestamp → {{ $now }}.
The expression syntax {{ $json.field }} passes data between nodes. $json is the output from the previous node (the webhook body). You don't type this — click the expression toggle { } next to the field and select from a dropdown.
Add a Slack Notification Node
~4 minutesClick "+" on the right side of the Google Sheets node. Search "Slack" and select it. Configure:
Click "Create new credential" → connect via OAuth2 → grant permission. Or use a Slack Bot Token with the chat:write scope.
Resource: Message. Operation: Post.
Type #n8n-test (include the hash).
Toggle expression mode { } and enter the message below.
🔔 *New contact form submission*
*Name:* {{ $json.name }}
*Email:* {{ $json.email }}
*Message:* {{ $json.message }}
*Time:* {{ $now.format('DD MMM YYYY, HH:mm') }}
Reference any node by name: use {{ $('Google Sheets').item.json.Name }} to pull data from a specific earlier node — useful when combining data from multiple sources in one message.
Want to Build AI-Powered Apps on Top of n8n?
Our n8n course teaches you to combine no-code tools like n8n with AI APIs and app builders — so you can ship full-stack AI products without backend code. Module 0 is free.
Try Free Lesson →Test the Workflow End to End
~3 minutesWith all three nodes configured and connected, test the full flow. Testing in n8n is visual — you see exactly what data flows through each node.
- Click the Webhook node → click "Listen for test event". The node turns green and waits.
- Send a POST request to the Test URL from your terminal or Postman.
- The Webhook node receives data — click it to inspect the parsed JSON fields.
- Click "Execute workflow" (triangle play button at the top). Each node runs in sequence.
- Each node shows a green check on success. Click any node to inspect its input and output.
# Test command — paste your actual webhook URL from Step 2
curl -X POST \
  https://your-instance.n8n.cloud/webhook-test/abc12345 \
  -H "Content-Type: application/json" \
  -d '{"name":"Jane Smith","email":"jane@example.com","message":"Hi, I want to connect."}'
Check two things: a new row in your Google Sheet and a Slack message in #n8n-test. Both confirmed — your workflow works.
Red error on a node? Click it and read the message. 90% of errors are a missing credential (re-authenticate) or a wrong field name in an expression (check $json.name matches the actual JSON key). The error always tells you exactly what went wrong.
Activate and Go Live
~1 minuteFlip the Active / Inactive toggle in the top right to Active (turns green). The workflow is now live.
- The Production URL activates. Update your form to use
/webhook/abc12345instead of/webhook-test/abc12345. - Every execution is logged in the Executions tab — status, timing, and full data visible for debugging.
🎉 Your first n8n workflow is live
Every time someone submits data to your webhook URL, n8n automatically saves a row to Google Sheets and fires a Slack notification. No manual work. No code. Runs 24/7.
5 Mistakes Beginners Make in n8n (And How to Avoid Them)
Almost every beginner hits these — and the fixes are simple once you know them.
Using the Production URL while still building
If you paste your production URL into your form before activating the workflow, nothing happens and you get no feedback. Always use the test URL (/webhook-test/) during development. Switch to production only after testing and activating.
Forgetting to authenticate credentials before testing
If you add a Google Sheets or Slack node but skip credentials, the node fails at test time with a vague auth error. Add credentials as you configure each node — n8n saves them globally so you only authenticate once per service.
Referencing field names that don't match the incoming JSON
If your webhook receives {"first_name":"Jane"} but your expression says {{ $json.name }}, n8n returns an empty value — not an error. Always click the Webhook node after receiving test data to see the exact field names, then copy them into your expressions.
Not setting Google Sheets column headers before mapping
n8n reads column headers from row 1 to generate the mapping dropdown. If row 1 is empty, you'll see no columns. Add headers first, save the sheet, then refresh the n8n node — columns appear automatically.
Building complex workflows without testing each node separately
When a 10-node workflow fails, finding the broken node is slow. The n8n way: test after adding each node using the small "Execute node" button. This isolates problems immediately and saves hours of debugging.
What to Build Next
Five practical next steps in order of increasing complexity:
Frequently Asked Questions
How long does it take to learn n8n?
Most beginners build their first working workflow within 30–60 minutes. To use n8n confidently for everyday automations (forms, CRM syncs, notifications, scheduled reports), expect 1–2 weeks of hands-on practice. Advanced features like sub-workflows, custom code, and AI pipelines take 4–8 weeks to master comfortably.
Can I use n8n without coding knowledge?
Yes. The visual node editor requires zero coding for the majority of workflows. You configure each node through form fields and dropdowns. The optional Code node (JavaScript or Python) is available for advanced logic but is never required. Most production automations — including enterprise-level workflows — are built entirely without code.
What is the easiest workflow to build first in n8n?
The simplest is Manual Trigger → Send a Slack message or email. One node, zero complexity. A practical second step is Schedule Trigger → HTTP Request → Slack. The Webhook → Google Sheets → Slack workflow in this tutorial is an excellent third project — it introduces three core patterns used in almost every real automation.
Is n8n free for beginners?
Yes. n8n Cloud has a free trial with no credit card required. The self-hosted version (Docker or npm) is completely free with no execution limits — ideal for learning and personal projects. Cloud paid plans start at $20/month when you need managed hosting with uptime guarantees for production workflows.
Related Articles
Ready to Build AI-Powered Apps & Automations?
The LearnForge n8n course teaches you to build real apps using FlutterFlow, n8n, AI APIs, and no-code tools — combined into a working product. Module 0 is completely free.
Try Free Lesson →