How to Build and Publish an Android App for Free in 2026: Complete Guide
Building an Android app no longer requires a developer, a big budget, or any coding knowledge. In 2026, you can build a real app, test it on your phone, and publish it to Google Play — for a total cost of $25. Here's exactly how.
Android App Development in 2026
In this article
What "Free" Actually Means for Android Apps
When people search for "how to make an Android app for free," they usually mean one of two things: either they want to build the app without paying for development tools, or they want to publish it without paying fees. Good news on both fronts — Android is genuinely the most accessible platform for free app development.
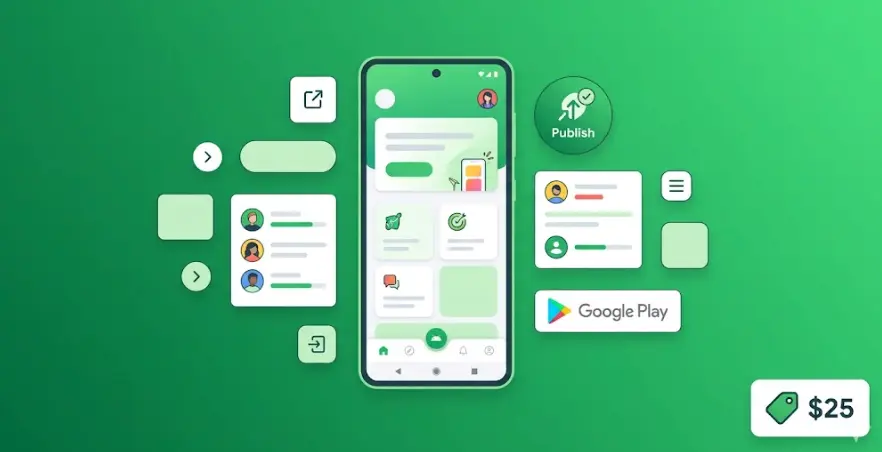
Unlike Apple, which charges $99 every year to publish on the App Store, Google charges a single one-time fee of $25 for a Google Play Developer account. After that, you can publish unlimited apps and unlimited updates — forever — at no additional cost. That one-time $25 is the only unavoidable expense in this whole process.
As for building the app: several powerful no-code platforms offer free tiers that let you design, build, and test a complete Android app without spending anything. The free tiers do have limits — mainly around exporting the app or publishing directly — but tools like MIT App Inventor are 100% free with no restrictions at all.
Bottom line on "free": You can build a working Android app for $0. To publish it on Google Play, you pay $25 once. That's it — no subscriptions, no annual fees, no revenue share on your first $1 million in earnings. Android is by far the most beginner-friendly and cost-effective platform to launch your first app.
Best Free Tools to Build an Android App Without Coding
Here are the tools that actually work for building real Android apps at zero cost in 2026. Each has different strengths — the right choice depends on what kind of app you're building and how far you want to take it.
MIT App Inventor
100% free — best starting point for true beginnersMIT App Inventor is a browser-based tool from MIT that lets you build Android apps with a visual block-based interface — no code, no downloads, no credit card. You design your screens by dragging components (buttons, text boxes, images, maps, sensors) onto a phone canvas. Logic is built by snapping together coloured blocks, similar to Scratch.
The tool is genuinely free — MIT funds it as an educational resource. You can export a real APK file and install it directly on any Android phone. For publishing to Google Play, you'll export the APK and upload it yourself (requires the $25 developer account).
Best for: First-time app builders who want to see results fast. Great for simple utility apps, educational tools, local business apps, and learning how apps work without any financial commitment whatsoever.
FlutterFlow (Free Tier)
Most powerful free option — build professional appsFlutterFlow's free tier lets you build a complete, fully-featured Android app — screens, navigation, Firebase database, user authentication, API integrations — and preview it in a browser or on a device via the companion app. The app you build is production quality, not a demo.
The free tier limitation: to export the Flutter code or publish directly to Google Play through FlutterFlow, you need a paid plan (from $30/month). However, you can export your project code on the free tier with some restrictions, or share via a direct device link for testing. If you're learning and validating an idea first, the free tier takes you very far before you need to pay anything.
Best for: Anyone who wants to build a professional Android (and iOS) app and plans to grow it. The free tier is ideal for learning and prototyping; a paid plan is needed only when you're ready to publish to Google Play directly through FlutterFlow.
Thunkable (Free Tier)
Simple cross-platform apps — good free middle groundThunkable sits between MIT App Inventor and FlutterFlow in complexity. It uses a visual drag-and-drop editor for screens and a block-based logic system similar to App Inventor — but the resulting apps look more modern and polished. The free tier allows one published app and includes core components (buttons, lists, forms, camera, GPS).
Thunkable publishes to both Android and iOS from the same project. On the free tier you can publish one Android app to Google Play directly from the platform. For multiple apps or removing the Thunkable branding, you need a paid plan.
Best for: Beginners who want something more polished than MIT App Inventor but simpler than FlutterFlow. Ideal if you're building one app and want to publish it to Android for free.
At a Glance: Free Tool Comparison
| Tool | Truly free? | Exports APK free? | Learning curve | App quality |
|---|---|---|---|---|
| MIT App Inventor | ✓ 100% free | ✓ Yes | Very low | Basic |
| FlutterFlow | Free tier (limits) | ✗ Paid plan | Medium | Professional |
| Thunkable | Free tier (1 app) | ✓ 1 app free | Low | Good |
| Adalo | Free tier (limits) | ✗ Paid plan | Low | Good |
Recommendation: If your goal is to build something and publish it today with zero spend — start with MIT App Inventor. If you want to build something more polished that can grow into a real product — use FlutterFlow's free tier to build and learn, then upgrade when you're ready to publish.
Step-by-Step: Build Your First Android App for Free
This walkthrough uses MIT App Inventor for the build (free, no limits) and Google Play for publishing ($25 one-time). Follow these steps in order.
Plan your app on paper first
Before opening any tool, sketch every screen of your app on paper — or use a free tool like Excalidraw. Write down: what does each screen show? What happens when the user taps each button? What data does the app need to save? Apps that fail usually weren't planned — builders open the tool first and realize halfway through that they don't know what they're building. Spend 30–60 minutes here and save yourself days of rebuilding. Use AI: ask ChatGPT to "list all the screens a [your app type] app needs" for a complete starting checklist.
Create your MIT App Inventor project
Go to appinventor.mit.edu and sign in with any Google account — completely free, no credit card. Click "Start new project" and give it a name. You'll see a canvas that looks like a phone screen on the left, and a panel of components on the right. Add your first screen components: a label for the title, buttons for navigation, a list viewer for any data. The canvas shows exactly how your app will look on a real Android phone.
Build your screens visually
Drag components from the right panel onto your canvas: Buttons, Labels, TextBoxes, Images, ListViews, Maps, and more. Each component has a properties panel where you set the text, color, size, and font. Build all your screens — MIT App Inventor lets you create multiple screens within one project. Use the built-in layout components (HorizontalArrangement, VerticalArrangement) to control how elements stack and align. Focus on making it functional before making it pretty.
Add logic with the Blocks editor
Switch to the "Blocks" view. Here you build logic by snapping coloured blocks together — no typing, no syntax errors. Example: drag a "when Button1.Click" block, then snap "open another screen" inside it. Or: "when Button.Click → save TextBox.Text to TinyDB → clear TextBox." The blocks are colour-coded by type: yellow for events, blue for component actions, green for math, orange for variables. Every app function you need — saving data, sending messages, reading the camera, showing a notification — has a corresponding set of blocks.
Test on your real Android phone
Install the MIT AI2 Companion app on your Android phone (free on Google Play). In App Inventor, click "Connect → AI Companion" and scan the QR code with the Companion app. Your app loads live on your phone in seconds — and updates in real time as you make changes. Test every button, every screen, every data entry. Find what breaks. Fix it. Test again. Do not skip this step — issues that look fine in the browser often appear on a real device.
Export your APK file
When your app is tested and working, go to Build → Android App (.apk). MIT App Inventor compiles your project into a real APK file and gives you a download link — completely free, no limitations. The APK is a standalone Android app file. You can share this file directly with anyone (they'll need to enable "Install from unknown sources" on their phone), or upload it to Google Play for public distribution.
Set up your Google Play Developer account
Go to play.google.com/console, sign in with a Google account, and pay the one-time $25 registration fee. Fill in your developer profile (name, email, contact details). This account lets you publish unlimited apps forever — no annual renewal, no per-app fees. The registration typically processes within a few hours. Once approved, you're ready to publish your first app.
Publish on Google Play
In the Google Play Console, click "Create app," choose "App" and "Free" (or "Paid"), and fill in your store listing: title (up to 30 characters), short description (80 characters), full description (4,000 characters — write clearly and include your target keywords), screenshots (at least 2, recommended size 1080×1920), a feature graphic (1024×500), and a privacy policy URL (required for all apps). Upload your APK under "Production → Releases." Submit for review — Google reviews usually take 3–7 days for new accounts. After approval, your app is live on Google Play worldwide.
Total time to first version: Planning (1–2 hrs) + Building in App Inventor (2–8 hrs) + Testing (1–2 hrs) + Google Play setup and submission (2–3 hrs). Realistically: a simple app can go from idea to submitted in one weekend.
Build a More Professional Android App — Step by Step
MIT App Inventor gets you started fast. Our AI Apps course takes you further — FlutterFlow, Firebase, AI features, and publishing to both Android and iOS. Module 0 and Module 1 are completely free.
Start Free Lesson →Real Cost Breakdown: What's Free and What Isn't
Here's an honest breakdown of every cost involved in building and running an Android app — so you know exactly what you're getting into before you start.
Watch out for "free" tools that aren't: Some app builders advertise as free but add watermarks to your app, limit you to 100 users, or charge to remove their branding. Always check the free tier restrictions before committing. MIT App Inventor and Google Play are the two tools that are genuinely free with no hidden gotchas.
How to Publish Your App to Google Play
Publishing to Google Play is simpler than publishing to the Apple App Store — the review process is faster, the requirements are more straightforward, and there's no macOS requirement. Here's what the process looks like in practice:
1. Prepare your store listing assets
You need: app icon (512×512px PNG), feature graphic (1024×500px), at least 2 screenshots (minimum 320px wide, maximum 3840px), a short description (up to 80 characters), a full description (up to 4,000 characters), and a privacy policy URL. Use Canva's free templates for the icon and feature graphic — they have Android-specific presets. Write your description with your main keyword in the first two sentences, since Google indexes app descriptions for search.
2. Create your app in the Play Console
In Google Play Console, click "Create app." Choose the default language, whether the app is free or paid, and whether it's an app or a game. Complete the "App content" section: answer the content rating questionnaire (determines the age rating), confirm your target audience, and confirm the app has no ads (or set up ads declaration if it does). Complete the "Store listing" with all your assets. These steps feel like a lot of forms — plan for 1–2 hours the first time.
3. Upload your APK or AAB file
Go to "Production → Releases → Create new release." Upload your APK (from MIT App Inventor) or AAB file (from FlutterFlow/Android Studio). Google prefers AAB (Android App Bundle) as it's smaller and faster, but APK works fine. Add a release name and release notes. Review the release — the console will flag any issues (missing permissions declarations, content policy violations, etc.) before you submit.
4. Submit and wait for review
Click "Send for review." New developer accounts typically wait 3–7 days for the first review. Google reviews primarily check for policy violations (malware, misleading content, privacy issues) rather than testing every feature manually. Most straightforward apps pass on the first submission. If rejected, Google emails you the exact reason and you can fix and resubmit — no additional fee. After approval, your app is live on Google Play within a few hours.
After publishing: Updates to your app go through a much faster review — usually 2–24 hours for existing apps in good standing. You can also use "Internal testing" to share your app with up to 100 testers before going public — no review required for internal tracks. This is very useful for getting feedback before launch.
5 Mistakes Beginners Make (and How to Avoid Them)
These are the most common reasons first-time app builders get stuck, give up, or get rejected by Google Play — and exactly what to do instead.
Mistake 1: Starting to build before planning screens
Opening the tool and improvising leads to apps that don't make sense to users. The navigation is confusing, screens are missing, and you rebuild the same screen three times. Fix: Sketch every screen on paper first. Define what the user does on each screen and where each button goes. This takes an hour and saves a week.
Mistake 2: Not testing on a real device before submitting
Apps that look fine in a browser preview often have layout issues, broken buttons, or slow data loading on a real phone. Google reviewers test on real devices and will reject apps with obvious functionality issues. Fix: Use MIT AI2 Companion or FlutterFlow's companion app to test on your actual Android phone at every stage of building, not just at the end.
Mistake 3: Missing the privacy policy
Google Play requires a privacy policy for all apps — even apps that don't collect any data. Submitting without one is an instant rejection. Fix: Use a free privacy policy generator (privacypolicygenerator.info or similar), host it on a free page (GitHub Pages, Google Sites, or your website), and link to it in your Play Console app settings before submitting.
Mistake 4: Building too complex an app for a first project
Beginners often want to build the full version of their idea immediately — social network, marketplace, AI features, payments, all at once. They get stuck, frustrated, and quit. Fix: Build a "Version 1" with just the core feature — one or two screens that do the main thing. Publish that. Get real user feedback. Add features based on what people actually want, not what you imagined they'd want.
Mistake 5: Ignoring the Google Play store listing
A great app with a bad store listing gets no downloads. Poor screenshots, a vague description, and no keywords mean Google can't surface your app in search, and users who find it don't understand what it does. Fix: Spend as much time on your store listing as you did building the app. Write a clear first sentence, use all 4,000 description characters, and create screenshots that show the app doing something useful — not just the home screen.
Frequently Asked Questions
Can I really build an Android app for free?
Yes. Building the app itself is completely free using MIT App Inventor (100% free) or FlutterFlow's free tier. The only cost you can't avoid is the $25 one-time Google Play Developer account fee — required to publish publicly on Google Play. You can test and share your app via direct APK file install on any Android phone before paying anything.
What is the best free tool to build an Android app without coding?
MIT App Inventor is the best fully free option — no cost, no restrictions, exports a real APK, and works entirely in a browser. For a more professional result, FlutterFlow's free tier is the strongest option — though you need a paid plan to publish directly through their platform. Thunkable offers a middle ground: free tier with one publishable app and no coding required.
How much does it cost to publish an Android app on Google Play?
$25 once — that's it. Unlike the Apple App Store ($99/year), Google Play charges a one-time $25 registration fee and then publishing is free forever. No annual renewals, no per-app fees, and no revenue share until your app earns over $1 million per year. For beginners, this makes Android the most affordable platform to launch on.
How long does it take to build an Android app for free?
With MIT App Inventor, a simple 3–4 screen app takes 2–4 hours for a complete beginner. A more functional app with a local database and multiple screens takes a weekend of focused work. With FlutterFlow, the learning curve is 1–2 weeks but the resulting app is significantly more professional. Either way, planning your screens on paper first is the single biggest factor in how fast you build.
Do I need to know programming to make an Android app?
No. MIT App Inventor, FlutterFlow, and Thunkable all use visual drag-and-drop interfaces with no coding. MIT App Inventor uses coloured logic blocks (similar to Scratch) instead of written code — you snap blocks together to define what happens when users tap buttons. For roughly 80% of standard app ideas, no-code tools are completely sufficient with zero programming knowledge required.
Related Articles
How to Create an iOS App Without Coding in 2026
FlutterFlow, Adalo, step-by-step guide, and how to publish to the App Store.
How to Write a Python Script with AI in 2026
Real examples, proven prompts, and the minimum Python you need to use AI scripts reliably.
Python vs Excel vs No-Code: Which to Choose?
Honest comparison with cost breakdown, 7 real scenarios, and a decision framework.